Okay, I am going to try something new with this post. For my final project in my Photoshop class, I was required to post what improvements I made to my photo in a step-by-step type way. I really liked it, so I thought I'd share my final project and I how I got there. First of all, most of the credit here belongs to Sampson- my wrinkly-face baby was a trooper! He sat through a few costume changes and even let me tie a bright red, flashing nose to his face at one point. He certainly loves his momma!
So here's my original photo. Obviously, there is a lot going on. The photo is pretty dark overall and there is so much stuff pulling the attention away from the subject (my pup). I knew my photo would need to be cropped, but first I chose to tackle the my major adjustments.
I opened my photo in ARC (Adobe Camera Raw) and I brightened the entire image and I made some slight adjustments to the white balance. The photo had a slightly yellow tint to it due to the color of my walls and the tungsten lights in my bedroom. I saved my photo as a PSD (Photoshop Document) and then I opened it in Photoshop to begin my more local adjustments.
Like I mentioned before, there was a lot going on. My bedside tables-including lamps, toilet paper, and a case of blank disks- are in the photo, along with the photos I have hanging above my bed. So, the first thing I did in Photoshop was crop my photo. That alone made a huge difference. The next thing I wanted to do was blur the background of the photo because, although I loved the bright lights, I hated their cords, so I wanted them gone. I made two copies of the background layer. (I was taught to never make destructive edits, so everything is done in a new layer or layer mask) In one layer, I made a selection of the entire wall behind my subject (all of the lights were selected). I then added a Gaussian Blur. (I don't know the exact number, but it as pretty high) Then, because there was such a hard edge to the blur, this is where my next background copy was used. I made a selection of the middle of the photo, excluding my subject, and I added a Gaussian Blur to that as well at a much lower number.
After I got the blur the way I liked it, I added a Curves Adjustment Layer to the entire photo to brighten it even more. I then used my color sampler tool to find the brightest highlight and darkest shadow and I made them both neutral (setting the highlights to 248 and the shadows to 8). After that, I wanted to lighten up the wall even more to make the lights super bright. I added another Curves layer and a layer mask with only the wall selected, then I increased the brightness. Then, my final step, I added a Vibrance layer and a layer mask and I selected just the blue blanket on my bed. I decreased the saturation to make the ornaments and my subject stand out even more. And VIOLA!- my final picture is one that I am pretty dang proud of!
What do you think? I love it! And seriously, without my amazing, loving, spoiled brat of a pup, I would have nothing. I still can't get over how well Sampson took direction that morning!
Apertures, Shutter Somethings, and All Those Other Things
Monday, December 31, 2012
Photoshop Fun- Putting My New Skills to Use
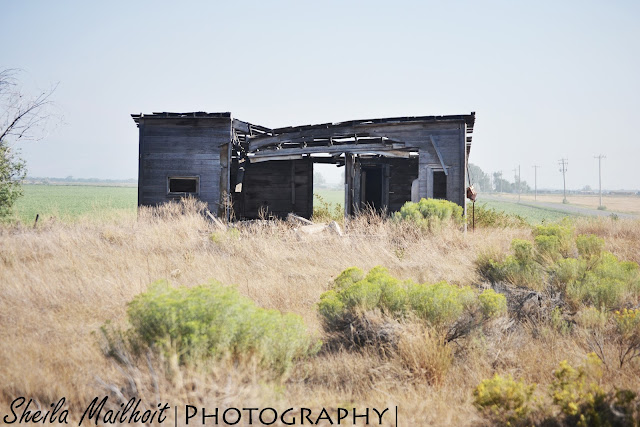
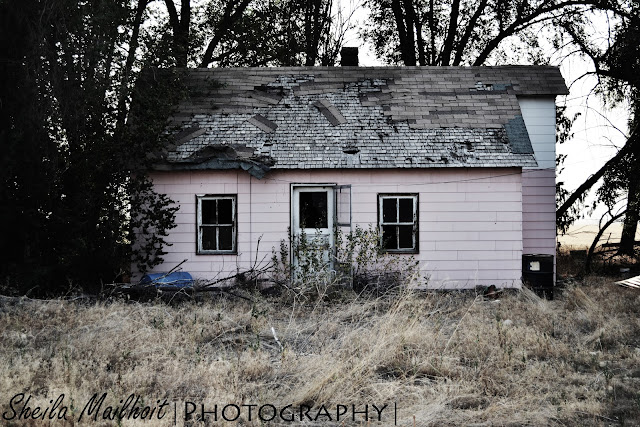
One of my favorite things I learned in my Photoshop class this last semester was split-toning. (Starting with a black and white or desaturized image and adding one color tone to the highlights and another color tone to the shadows.) LOVE the way this looks in my "Oldie Buildings" series!
A Little Trip to McCammon
A few months ago, Curtis and I took a somewhat spontaneous drive to McCammon (it's only about 45 minutes away) and we found this beautiful campground. It was this little valley that was almost completely filled with maple trees. There was a cute little creek that ran down the center of the campground, and everywhere you looked, there was this surreal, hot pink explosion of color from the leaves. I think it will now be a annual thing to go every summer/fall and spend a day picnicking and taking photos there. I just LOVE all of the colors!
Oldie Buildings
The beginnings of my "Oldie Buildings" series. I love the look and feel of old, dilapidated and abandoned houses and buildings. I love to sit and imagine everything that might have happened there at some point in time. I don't know why, but I have the strongest fascination with these buildings, so I have started working on a very large series. This is a preview of what I have so far.
Pingree, Idaho:

Downey, Idaho: (The Big, Red Barn- this place holds so many memories for me. It is one of my favorite places to visit)
Rose, Idaho:

Downey, Idaho: (I wanted to keep these separate from the Big, Red Bard because I thought it deserved a place of its own)
Subscribe to:
Comments (Atom)


